This Content is Sponsored by

Yeast is the unsung hero in every batch of beer. It’s responsible for turning sugars into alcohol, creating the flavors, and giving us… beer! If you’re a homebrewer or even a small-scale craft brewer, you might be missing out on a great opportunity to save money and keep your beer consistent by harvesting and repitching yeast. Not only is it budget-friendly, but it also ensures you’re using a familiar yeast strain that can help you perfect your brew.
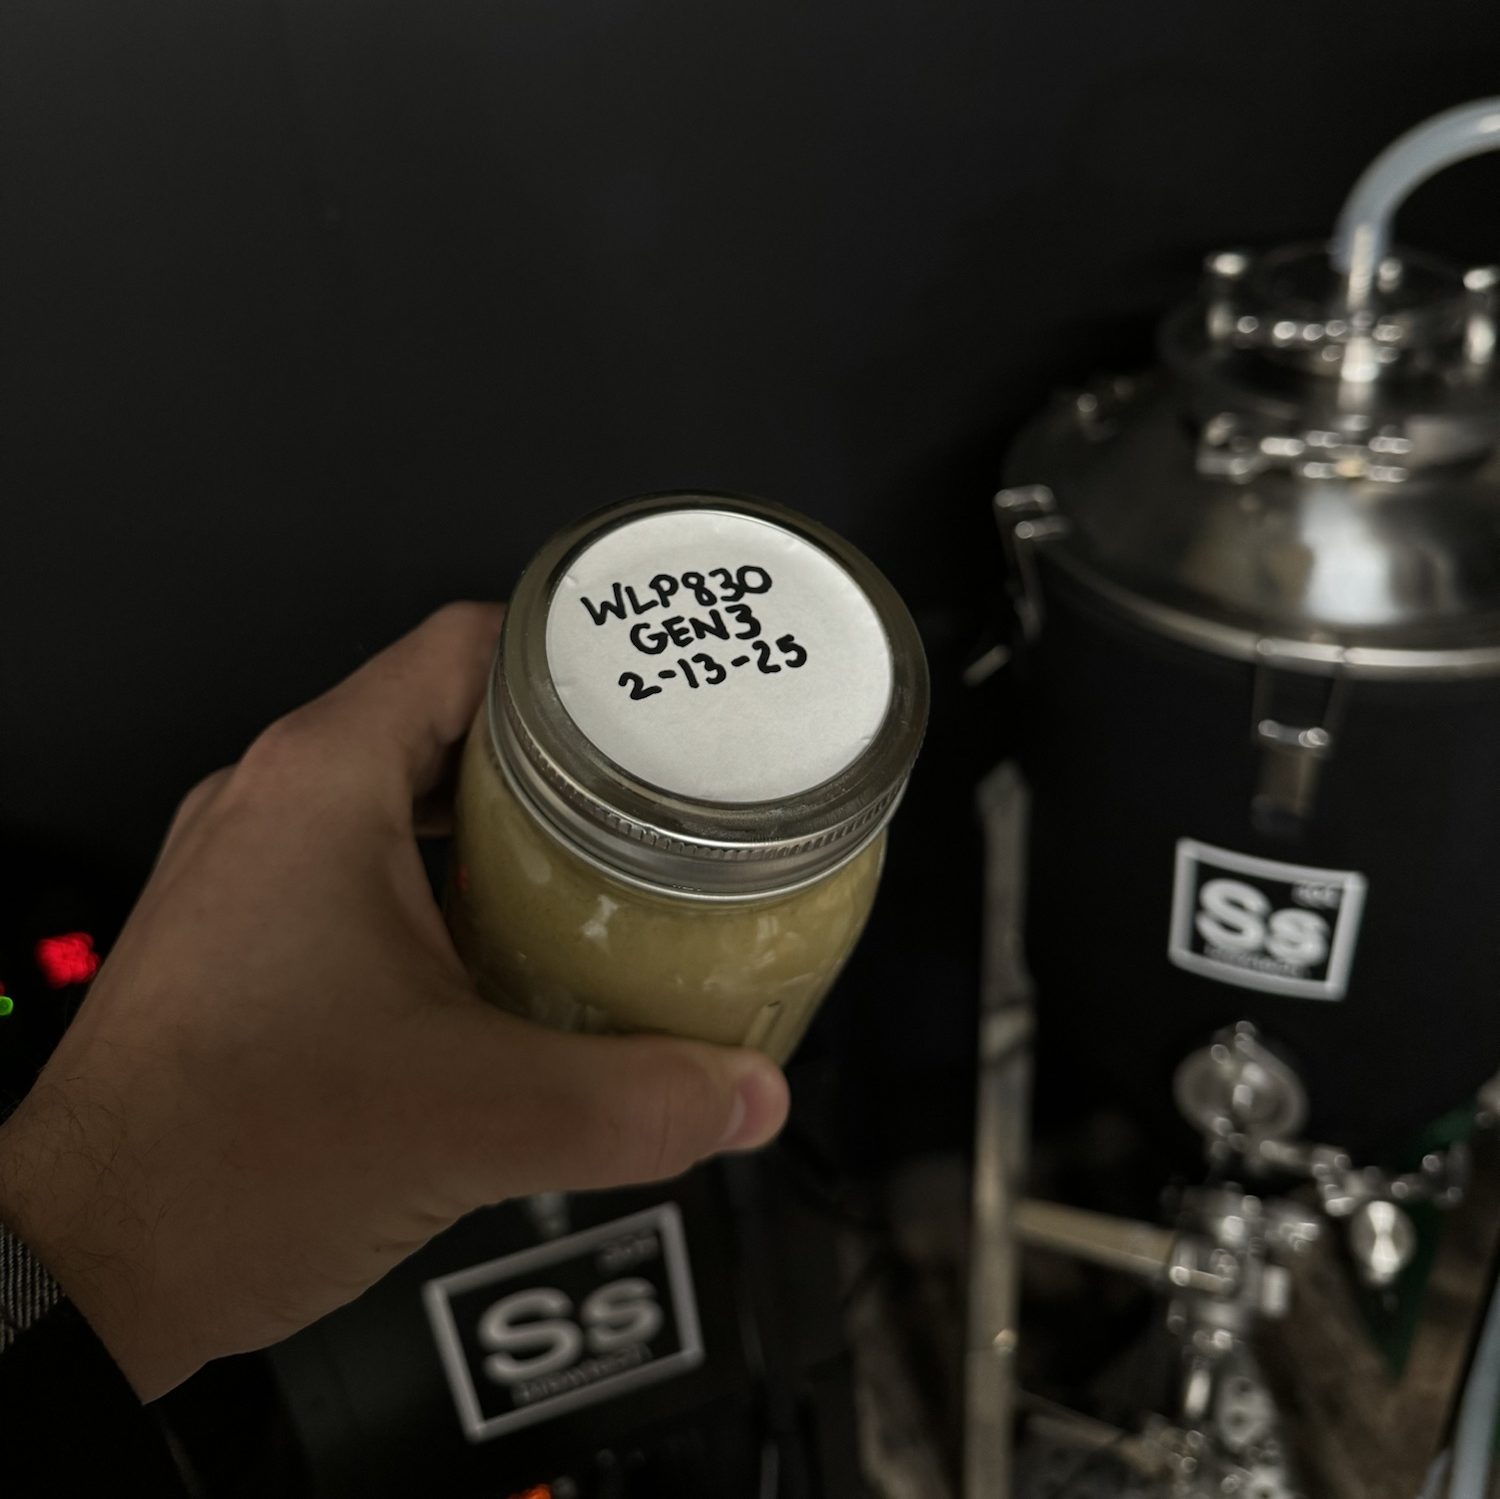
I haven’t been harvesting yeast very long, but I had picked up a nano pouch of WLP830 from White Labs for a 1/2Bbl batch and didn’t want to let all the yeast go to waste after one pitch. It is now currently a Gen3 strain just waiting to go into another German Lager. It is important to know the yeast in which you are dealing with and making sure you’re pitching the harvested yeast into the appropriate style of beer.

The Mashout Magazine wants to thank White Labs for partnering with us to not only be able to share information like this, content including recipes and experimentsaround their strains, but to also offer homebrewers 5% off homebrew pouches from them directly. You can use code “MashMag” for 5% off your order all year long!
Shop strains here

What is Yeast Harvesting?
Yeast harvesting is the process of collecting the yeast from a previous fermentation and saving it for future batches. Rather than buying a new packet of yeast each time you brew, you simply use a portion of the yeast cake—that dense layer of yeast sediment at the bottom of the fermentor—and reuse it in your next brew. It’s a great way to save money, maintain consistency, and even preserve hard-to-find yeast strains that you might want to reuse in future batches.
Why Should You Harvest and Repitch Yeast?
- Save Money: Commercial yeast packets aren’t cheap, especially if you brew frequently. By reusing yeast, you cut down on the cost of each batch.
- Consistency: If you’re brewing the same style of beer or a series of beers with a similar flavor profile, using the same yeast strain ensures the taste and character stay consistent.
- Preserve Special Strains: Some yeast strains, especially those that are hard to find or custom-made, might not always be available. By harvesting and repitching, you get to hang on to a specific strain you like.
- Go Green: Reusing yeast is a more sustainable way to brew since you’re reducing waste and making use of what you’ve already got.
How to Harvest Yeast
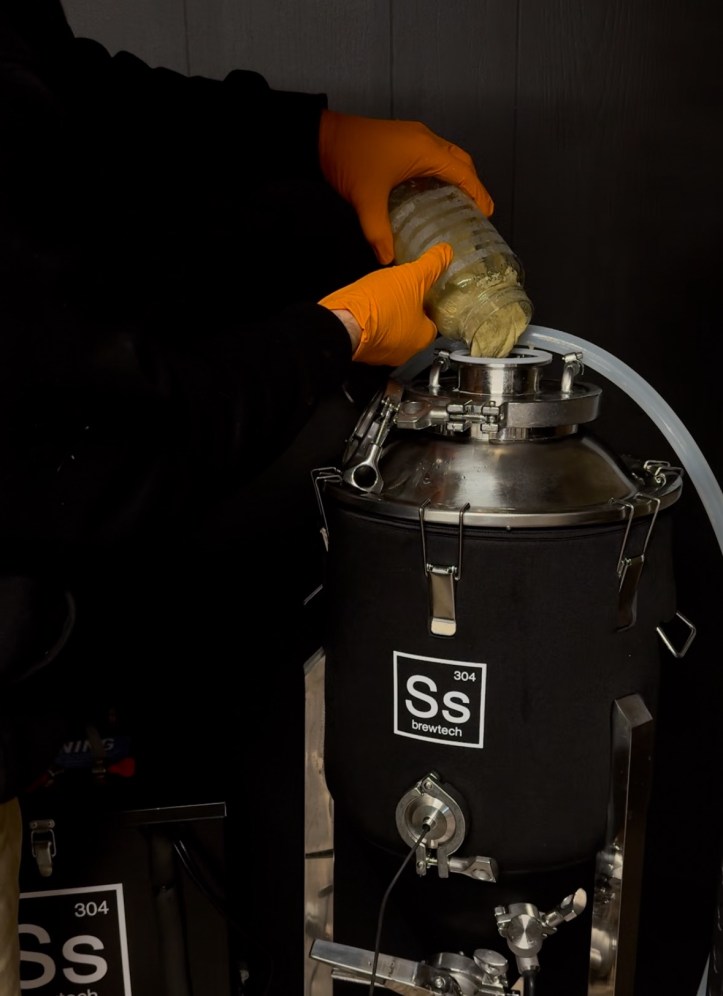
- After Fermentation: Once your fermentation – and cold crash – is done and you’re getting ready to transfer your beer to a brite tank, keg or bottling bucket, take a look at the yeast cake settled at the bottom. This is where your yeast is hanging out, and it’s what you’ll be saving for your next batch.
- Get Your Equipment Ready: Make sure all your equipment—jars, spoons, and anything else that will touch the yeast—is sanitized. Cleanliness is key here. Even a small amount of bacteria or wild yeast can ruin your next batch, so don’t skip the sanitation step.
- Collect the Yeast:
- Carefully pour the yeast into sanitized jars. Be careful to leave the trub—the gunk of hop debris and proteins—behind.
- If you’re using glass jars, pop them in the fridge until you’re ready to use them again. This keeps the yeast dormant but alive.
- Refrigerate: If you plan on using the yeast soon, the fridge is fine—just make sure to properly store it in sanitized containers. Yeast can last a while in the fridge. If needed, make a starter with it!
Please note that you will need a conical fermentor with the ability to dump and/or harvest the yeast.
Repitching Yeast: How to Get It Ready for the Next Batch
- Bring the Yeast Back to Life: When you’re ready to brew again, it’s time to “wake up” the yeast. If you’ve stored it in the fridge, depending how long it has been, you might want to make a yeast starter. When I harvested the WLP830 from my German Helles Exportbier, I had repitched the yeast into my Munich Helles two days later.
- Pitch the Yeast: When you brew your next batch, just pitch the yeast—or starter directly into the wort. If you saved the yeast in smaller portions, you don’t need to use it all—just add what you need, based on the size of your batch and the yeast strain’s health.
- Watch for Activity: After pitching, you’ll want to keep an eye on the fermentation. Sometimes, repitched yeast might take a little longer to start, but it should eventually get going. Monitor your temperature, gravity, and fermentation progress just like you would with any fresh yeast.
Tips for Success When Harvesting Yeast
- Sanitation Is Everything: This can’t be stressed enough. Always sanitize everything that will touch the yeast, from your fermentor to your jars. Contamination can lead to off-flavors or even spoilage, so keep things clean.
- Store It Right: If you’re not repitching right away, store your yeast in the fridge. For longer storage, freezing works well, but remember to thaw it out and test its viability before using it again.
- Make a Starter: If your yeast has been sitting for a while, it might be a good idea to make a yeast starter. This lets you test the yeast’s activity and ensure it’s still viable before pitching it into a full batch of beer.
- Keep Track of Your Strain: If you brew with different yeast strains, label your jars so you know which is which. It’s easy to mix them up if you don’t keep track, and using the wrong yeast can mess with the final flavor.
- Limit the Number of Times You Reuse: While you can reuse yeast a few times, there’s a point where it starts to lose its effectiveness. After about 3-5 generations, it’s usually best to start fresh with a new packet of yeast.
What Can Go Wrong?
Even though yeast harvesting and repitching is a great technique, it’s not always foolproof. Here are a couple of things to watch out for:
- Contamination: If you don’t sanitize your equipment thoroughly, you risk contaminating the yeast, which can lead to off-flavors or infections in your beer.
- Yeast Mutations: Over time, yeast can mutate and change its characteristics. While this isn’t too common, it can happen if the yeast is reused too many times, especially with high-stress fermentation environments.
- Fermentation Issues: If the yeast you harvested is old or unhealthy, you might notice sluggish or incomplete fermentation. If this happens, consider making a yeast starter or using fresh yeast.
Conclusion
Harvesting and repitching yeast isn’t just a way to save money—it’s a great technique for maintaining consistency in your brewing and ensuring you’re using a yeast strain that works for your beer style. By following a few simple steps and staying on top of sanitation, you can reuse yeast effectively and keep brewing high-quality beer batch after batch.
Whether you’re brewing your favorite IPA or a crisp lager beer, the ability to harvest and repitch yeast makes brewing easier, cheaper, and a lot more fun. So next time you’re done with a brew, don’t toss that yeast cake—save it for your next brew day.
Be on the look out for my German Helles Exportbier & Munich Helles Recipe Articles coming soon!
WLP830 is this months free yeast presented by the Monthly White Labs Yeast Giveaway! Make sure you are subscribed to enter. For rules and information head on over to the giveaway page.
By Jordan V, Billy’s Tavern Homebrewing
Jordan is a California native. When he is not brewing he can be found drinking beer with friends, duck hunting, and getting lost in a good book or video game. When he is not out on an adventure with his wife, he can be found at home with his two lovable dogs. Stay up to date by following him on Instagram.

Discover more from MASHOUT MAGAZINE
Subscribe to get the latest posts sent to your email.
